Tuesday, 12 July 2011

Is there something lurking in the long grass?

By Trumpety Trump

We recently decided during a drive out one Sunday afternoon, that it would be nice to take a walk through a part of Ashdown Forest, the 'home' of Winnie-the-Pooh. The Forest is at the heart of the High Weald Area of Outstanding Natural Beauty and has national and international protection because of its wildlife, a great place to take the children.

We stopped off but as we set off through the heathland, I suddenly released how unprepared we were, not in terms of weather protection or footwear but from something far more insidious. Something that, if I had not previously researched the subject, would not even have registered - the risk of tick bites!


Now although the idea of a tick bite itself might seem quite unpleasant, it is the fact that ticks are among the most efficient carriers of disease that is more the issue. One website I had encountered put them only behind mosquitoes World Wide in this respect. It was discovered in the mid-1970s that ticks are the primary (and possibly only) transmitters, or vectors, for Lyme disease. Lyme disease is a debilitating, though rarely fatal, infection that is often misdiagnosed because early symptoms closely resemble the flu. Shuddering thought.

Ticks work by ambush, waiting on the tips of grasses and shrubs, for a moving animal or person to brush against them. They then quickly let go of the vegetation and climb onto the host. Ticks can only crawl but are often found on the scalp having usually crawled there from lower parts of the body.


Obviously the best way to protect yourself and your family against tick-borne illness is to avoid tick bites. If you are entering an area where you expect ticks to be present, then wear protective clothing such as long-sleeved shirts, long trousers, boots or sturdy shoes and a head covering. Tucking your trouser bottoms in your socks also helps. Remember, ticks are easier to detect on light-coloured clothing. This was our first mistake, between us we were either wearing shorts or summer dresses.

I remembered that you should walk in the centre of trails and paths so that the plants do not brush against you. At least I could keep an eye on the children with regard to this and they were asked to walk in the middle of the paths.

Ideally you should apply an insect repellent known to be effective against ticks on your skin, to discourage any ticks that you do come into contact with from biting. Some sites including BADA UK also recommend the use of insecticide Permethrin to treat clothing, especially trousers. Obviously you should always follow the label instructions if you choose to do this. Neither of these were an option on this occasion but are worth remembering for the future.

Advice I recalled at the time was to check yourself, children and other family members every two to three hours for ticks. If you take pets with you, check them for ticks too. I was a little over-cautious and actually checked every half an hour.


We were lucky and no one was bitten but should you be less fortunate then remember the best chance of avoiding infection from a tick bite is to remove the tick within the first 12 hours. A tick's mouth parts are barbed and can remain embedded and lead to infection at the bite site, if not removed properly. You should not try to burn the tick with a match or cover it with petroleum jelly or nail polish, these methods distress the tick causing it to regurgitate its stomach contents back into you, immediately increasing the chance of infection.

The best way to remove a tick is to grasp it firmly with tweezers as close to the skin as possible and gently, but firmly, pull it straight out. Do not twist or jerk the tick. There are special tick removing tools on the
market, check out the links below.

Wash the bite area and your hands thoroughly with soap and water and apply an antiseptic to the bite site. If you experience a rash that looks like a bull's-eye, a rash anywhere on the body or an unexplained illness accompanied by fever following a tick bite, you should consult your doctor and explain that you were bitten by a tick. Disease carried by ticks can be treated with antibiotics. However, the type of antibiotic can vary and individuals should be treated early in the infection.

Trumpety Trump felt you should be aware of the potential threats of ticks and something to take into account when you are next wading through the long grass!

Reference websites

http://www.lymediseaseaction.org.uk/index.htm Lymes Disease Action
http://www.bada-uk.org/ Borreliosis and Associated Diseases Awareness UK
http://animals.nationalgeographic.com/animals/bugs/deer-tick/ Deer Tick

Tuesday, 21 June 2011

Green Shoots (Part 2)

by Trumpety Trump

Over a wet weekend it can be difficult to find things to do in the garden with the kids. However, if you are lucky enough to have a sheltered area, and were encouraged by my previous 'Green Shoots' blog about planting seeds and bulbs with the children, read on....

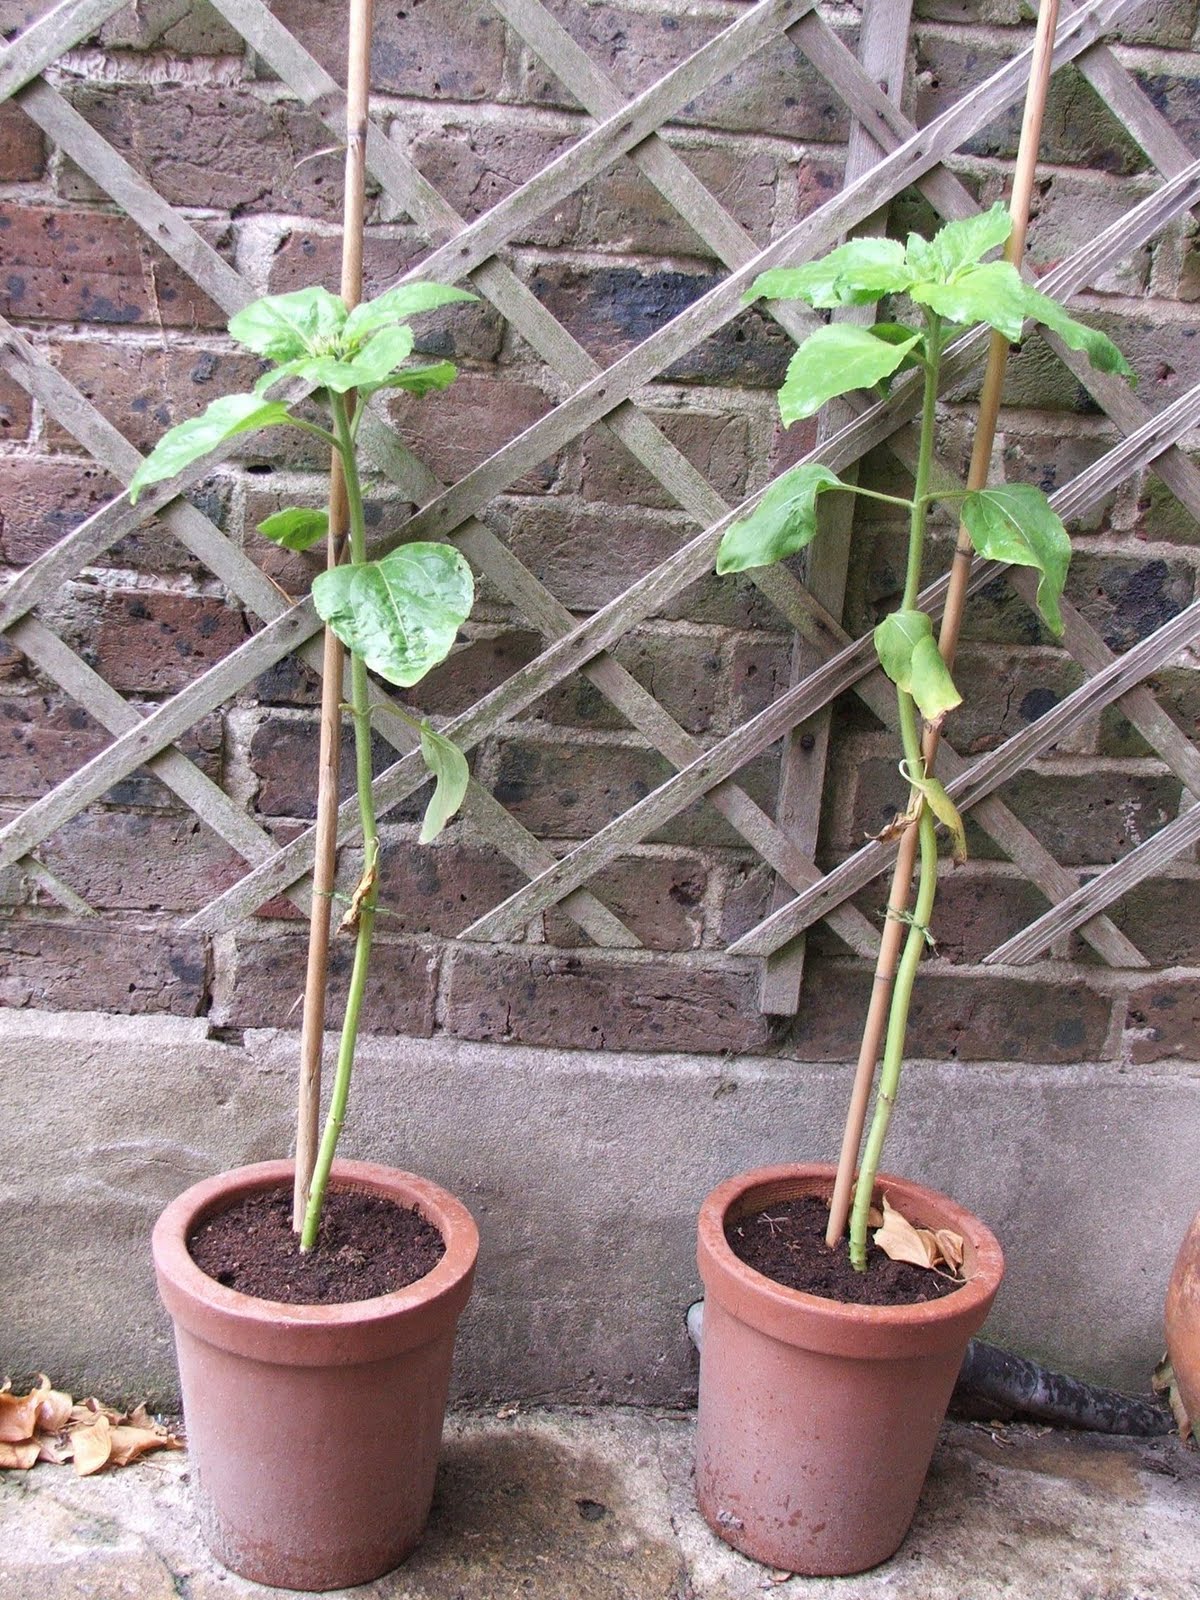
I thought it was time to be looking at re-potting and assessing how our little projects were progressing. In March (which seems like a lifetime ago now), we planted some sunflower and tomato seeds together with a variety of bulbs. Their gradual growth has been watched avidly every day by the children and certainly the recent rain has given them all a healthy boost.


The little paper cups we planted the sunflower seeds in were getting far too small to sustain their recent rapid growth. We managed to find some old unused terracotta pots laying around in the garden, but any pot that allows drainage will do. The children enthusiastically filled the pots with enough compost and the sunflowers were turned out with some gentle teasing of the roots, to encourage them into their new homes. Any gaps were filled with more compost due to the new pot size, patted gently down and watered.


We also moved the six best tomato plants to grow bags, although some overzealous trampling has meant one plant is looking a little bit sorry for itself! In the meantime, the wild flowers we planted to attract insects, have finally started to show some variety in colour. Although, so far, we've only had some bumble bee visitors, the children are hoping to find some other interesting insects to capture in their bug nets. They especially love examining their creepy crawly finds from the garden by putting them in their bug box, before letting them roam free again (obviously the bees don't get caught!). Lastly, the bulbs previously planted were slug attacked but they are making a come back and hopefully will catch up with everything else.

The kids certainly enjoyed their gardening and although the rest of the garden was a wet no-go zone, we kept dry and happy. If you're in need of some child-size tools, why not look at one of Trumpety Trump’s latest additions - the super children's Garden Set with Sturdy Bag and 6 Tools.

Saturday, 11 June 2011

Things making me smile...

from Trumpety Trump by Amanda Ranford

Half term swept past in a flash as usual and things are pretty much back to normal. We took off to our favourite hideaway place (Cornwall) for a sneaky rest during the mini break. Of course too many ice creams topped with irresistible clotted cream were devoured and we made the most of some lazy evenings alfresco dining when the weather was fine.

Here's a few things making me smile recently...


{Building a sandcastle and then watching the waves wash it away}


{Just one of many beautiful Cornish beaches}

{It's either Kelly's or Callestick Farm ice-cream for me!}

{Having fun looking for fish}

{A row of Lorikeets at Longleat Safari Park}

Thursday, 9 June 2011

Create an amazing hot air balloon out of papier-mâché

I'm delighted (and slightly relieved!) that the Trumpety Trump shop window display has finally come to an end. I thought it would be great to create a hot air balloon scene made from papier-mâché (French for 'chewed paper'!); little did I realise how long it would take! I have to say though that all those late evenings painstakingly applying layer upon layer of newspaper with glue, was worth it in the end. I am now delighted to be looking out my shop window at floating balloons painted in bold, eye-catching colours.

For those of you who have the patience, here's how to make a papier-mâché hot air balloon...

1. Firstly, I inflated some balloons and ripped up lots of newspaper into approximately 6-8 inch strips. If you are doing this with a child, smaller balloons are easier to papier-mâché, especially for young children.

2. PVA glue and water (about 3 parts glue to 2 parts water) were mixed together and the adhesive applied with a paintbrush to sections of the balloon. The strips of newspaper were then placed on the glue and the edges smoothed out with the brush. This process was repeated, ensuring that the paper pieces were overlapping as I covered the entire balloon. I then hung the balloon up to dry for the evening by attaching a bit of string to the end of the balloon.

3. Once the first layer of papier-mâché was dry, two further layers were applied and then left to dry again overnight (I used white paper for the final layer). Once completely dry, the balloon inside was popped and the bits of balloon latex removed.

4. I then cut a 3 inch diameter around the air hole end of the papier-mâché. Small baskets were made out of paper cups wrapped in brown packing paper and attached with string to the papier-mâché.

5. An easy design was created and the mould painted in bright colours with poster paint. Ta-dah!

My husband did a splendid job of making a huge papier-mâché hot air balloon which was carried out in much the same way as above. The difference being he used chicken wire to create the balloon structure, instead of a balloon. Once the desired balloon had been manipulated into shape, it was held together with cable ties. Layer upon layer of strips of newspaper were again applied until it was completely solid and ready to be painted.


The children got involved with the creation of the large hot air balloon and had lots of fun in the process. They particularly enjoyed splashing glue all over the place whilst we frantically put strips of paper over the mould!


WARNING: A fair amount of patience is needed if you get the little ones involved!

Monday, 23 May 2011

The Best Scones!

Time has whizzed by lately and I hadn't noticed the weeks passing by... hence this post is a little overdue!

Recently there have been a lot of 'behind the scenes' jobs to do in the Trumpety Trump shop, one of which is my next window display. This seems to have taken rather a long time as I am doing it from scratch (with the help of my husband who gets roped into these things!). All will be revealed when it's finished!

In the interim, I have been baking with my eager little helper (my daughter) and again, I have picked a tried and tested recipe to pass on to you.

It's a dead easy recipe (by Nigella Lawson) which the children can help make and of course tastes delicious too. I think these scones are heavenly when they are eaten freshly baked and topped with lashings of clotted cream and strawberry jam! The photo just doesn't do them justice. Here goes, and enjoy...


Ingredients

500g plain flour
1 tsp salt (I only use 3/4 tsp salt as I found the suggested amount made the scones taste just a bit too salty for my liking)
2 tsps bicarbonate of soda
4 1/2 tsps cream of tartar
50g cold unsalted butter, diced
25g Trex, in teaspooned lumps (or use another 75g butter)
300ml milk
1 large egg, beaten, for egg-wash
6 1/2 cm crinkle-edged round cutter
1 baking tray, lightly greased

Preheat the oven to 220 degrees celcius/gas mark 7

Sift the flour, salt, bicarb and cream of tartar into a large bowl. Rub in the fats till it goes like damp sand. Add the milk all at once, mix briefly - briefly being the operative word - and then turn out onto a floured surface and knead lightly to form a dough.

Roll out to about 3cm thickness. Dip the cutter into some flour, then stamp out at least 10 scones. You get 12 in all from this, but may need to reroll for the last 2. Place on the baking tray very close together - the idea is that they bulge and stick together on cooking - then brush the tops with the egg-wash. Put in the oven and cook for 10 minutes or until risen and golden.

Makes 12.

Go on, give them a go, you won't be disappointed!

Monday, 9 May 2011

Things making me smile...

Now that the Royal Wedding fever and Bank Holidays are over, life seems to be settling down a bit. The children are back, nestled in pre-school, and our much needed routine is back on track. I've been able to knuckle down again without battling the workload whilst a child dangles off each leg, so life is pretty good! Things making me smile recently...

{The beautiful sound of the bells ringing at Westminster Abbey after the Royal Wedding. This picture was taken just outside the Abbey; I thought the row of flags looked stunning with Big Ben in the background.}

{Seeing the Royal Weddding 'balcony kiss' at Buckingham Palace and of course catching a glimpse of the Queen, albeit from a distance!}

{A blend of colourful tulips in St James's Park}.

{My serene looking Siamese cat (Merlyn) lazing around in a flower pot}

{Bare wooden 'abc' templates for painting so that they can be put on the children's bedroom walls.}

Thursday, 5 May 2011

Tulips Galore

by Amanda

Yesterday we visited the annual Tulip Festival at Pashley Manor Gardens, Ticehurst for the third year running. I’m always enchanted by, what is known to be, ‘one of the finest gardens in England’. The blend of romantic landscaping, old trees, ponds and fountains are sumptuous. It’s my favourite time of the year for visiting this quintessential English garden. Wisteria cascades down the rear of the Manor house, thousands of colourful tulips fill the gardens and the woodland is carpeted with bluebells.


We spent most of the day there and enjoyed lunch in the picnic area. The children really enjoyed themselves and they fluttered through each fairytale garden fascinated by the stunning sculptures, the vegetable garden, the colour and scent of the tulips and the beautiful water features.

The great thing about Pashley Manor Gardens is that it has a friendly and charming atmosphere. The children were free to roam and explore and there were no disapproving looks in sight when we produced our very own colourful wooden Bug Nets to see what we could find in the field! The homemade food from the Garden Cafe is excellent too and we finished the day off with drinks and cake on the terrace in the warm afternoon sun.


Admission is £8.50 and children (under 6) go free so a great day out that won't break the bank. The Tulip Festival ends on the 8th May 2011 so hurry!